 USA

How to Insulate Ducts in an Unconditioned Attic
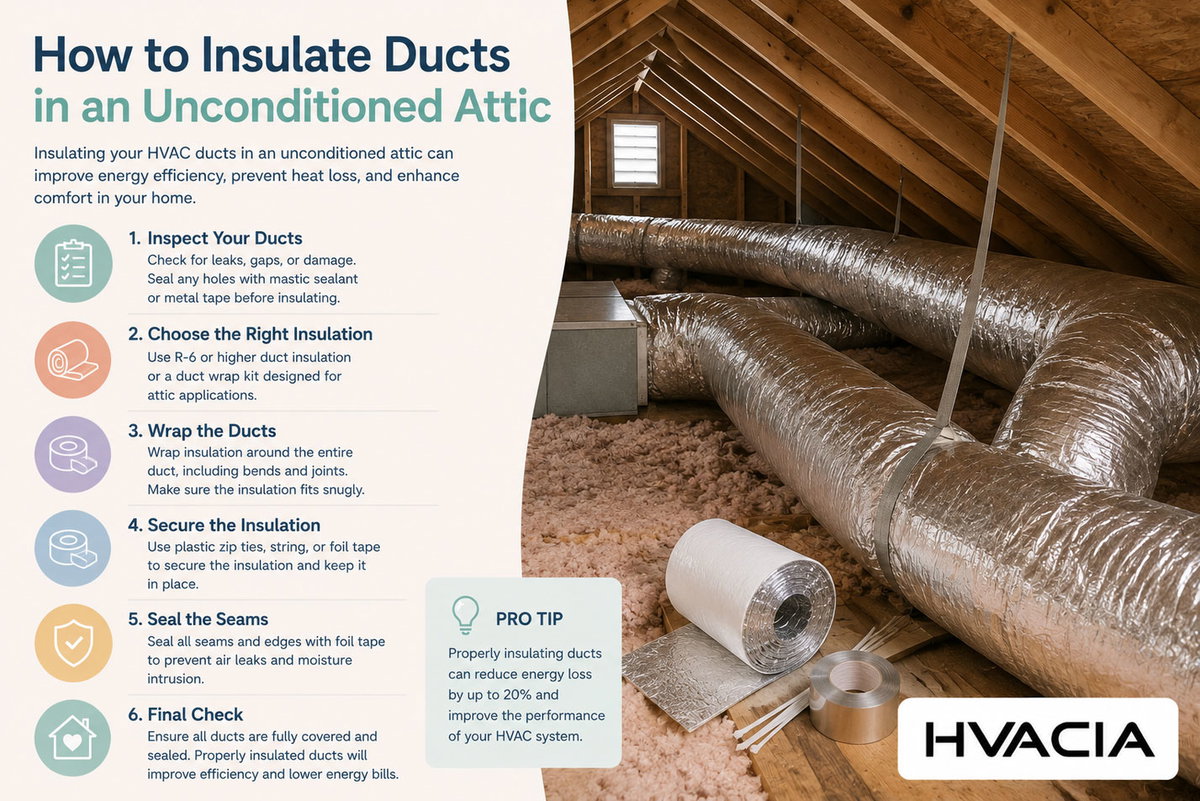
Most homeowners don't think about their ductwork until something feels off — a bedroom that never quite cools down in August, an energy bill that keeps climbing, or a contractor who mentions, almost in passing, that half your supply runs are sitting bare in a 140°F attic. That last one is more common than people realize. Ductwork tucked into unconditioned attics is one of the biggest, least-visible sources of wasted energy in American homes, and insulating it properly is one of the highest-return home improvement projects you can tackle yourself, or hire out affordably.
This guide walks through why attic ducts lose so much energy, what R-value your ducts actually need, which insulation materials make sense, and how to do the job step by step — whether you're doing it yourself over a weekend or briefing a contractor so you know what good work looks like.
Why Attic Ductwork Loses So Much Energy
An unconditioned attic is one of the most brutal thermal environments in a house. In summer, attic air temperatures routinely climb well above 120°F under asphalt shingles, even when the rest of the home sits at a comfortable 72°F. In winter, that same space can drop close to outdoor temperatures. Your ductwork — the metal or flex tubing carrying conditioned air from the furnace or air handler to every room — runs directly through that extreme zone.
Every foot of duct exposed to that temperature swing is losing (or gaining) heat before the air ever reaches a supply register. Industry estimates commonly put duct-related energy loss at somewhere between 10 and 30 percent of the total conditioning energy a system produces, depending on duct length, insulation condition, and how well the seams are sealed. That's not a rounding error. It's the difference between a furnace that runs efficiently and one that runs constantly to compensate for air that's already lost a chunk of its heating or cooling power by the time it reaches the room.
Two separate problems usually hide inside that number: heat transfer through the duct wall, and air leakage at the seams and connections. Insulation solves the first problem. Sealing solves the second. Doing one without the other leaves real money on the table, which is why the two go hand in hand in every credible guide on the subject.
R-Value Requirements: What Code Actually Asks For
R-value measures resistance to heat flow — the higher the number, the better the material blocks conductive heat transfer. For ductwork, R-value requirements vary by climate zone and by where exactly the duct sits, because a duct buried under attic insulation behaves differently than one hanging exposed near the roof deck.
Model energy codes have tightened over the years. The 2021 International Energy Conservation Code (IECC) and the current International Residential Code (IRC) both set a baseline of R-6 for ducts in unconditioned spaces, stepping up to R-8 for supply ducts in unconditioned attics across most climate zones, and R-12 in the coldest zones. California's Title 24 code goes further, requiring R-8 on all ducts in unconditioned space statewide, regardless of climate zone, because the state prioritizes consistency over regional variation.
| Duct Location | Typical Minimum R-Value | Common Recommendation | Notes |
|---|---|---|---|
| Inside conditioned living space | None required | None required | Duct surface temperature is close to room temperature |
| Unconditioned basement or garage | R-6 | R-6 to R-8 | Less extreme than an attic, but still worth insulating |
| Unconditioned attic (climate zones 1–4) | R-6 to R-8 | R-8 | Most residential building departments default here |
| Unconditioned attic (climate zones 5–8) | R-8 to R-12 | R-12 | Cold-climate attics see the widest temperature swings |
| Exterior or rooftop ducts | R-8 | R-8 to R-12 | Direct exposure to weather and solar heat gain |
| California (Title 24, any zone) | R-8 | R-8 | Applied uniformly regardless of climate zone |
Local amendments can push these numbers higher, so the smart move before buying materials is a quick call to your local building department to confirm the current adopted code cycle in your area. Codes get updated on a multi-year cycle, and not every jurisdiction adopts the newest version immediately — some are still running IECC 2015 or 2018 provisions, others have already moved to 2021 or 2024.
One detail worth flagging: buried ducts — ones fully covered by loose-fill attic insulation — often get credited with a lower minimum R-value, sometimes as low as R-3.5, because the surrounding insulation is doing double duty. But that only holds true if the duct is completely sealed first. A leaking duct buried under insulation is arguably worse than an exposed leaking duct, because the leak becomes invisible and pushes conditioned air straight into the insulation cavity instead of the room.
Choosing the Right Insulation Material
Not all duct insulation is created equal, and picking the wrong product for the situation is one of the most common ways homeowners waste money on this project. Here's how the main options stack up against each other.
| Material | R-Value per Inch | Best For | Moisture Resistance | Relative Cost |
|---|---|---|---|---|
| Fiberglass duct wrap (foil-faced) | ~R-3 to R-4.2 per inch | Round and rectangular metal ducts in attics | Good, when the vapor barrier is intact | Low |
| Mineral (rock) wool wrap | ~R-3 to R-4 per inch | High-heat areas, better fire resistance | Good | Moderate |
| Rigid fiberglass board | ~R-4 to R-6 per inch | Large rectangular plenums and trunk lines | Good | Moderate to high |
| Closed-cell spray polyurethane foam | ~R-6 to R-7 per inch | New construction, buried or hard-to-reach ducts | Excellent | High |
| Reflective foil-bubble wrap | ~R-1 to R-3.5 (radiant benefit varies) | Supplemental layer over existing insulation | Excellent | Low to moderate |
| Pre-insulated flex duct | Manufacturer-rated, commonly R-6 or R-8 | New duct runs or full replacements | Good | Moderate |
For most homeowners insulating existing metal ductwork in an attic, foil-faced fiberglass duct wrap is the practical default — it's affordable, available at any home center, comes in R-6 and R-8 thicknesses, and installs without specialized tools. Rigid board makes more sense on large rectangular plenums near the air handler, where wrap tends to sag or compress at corners. Spray foam is usually a job for professionals, since it requires equipment and protective gear, but it delivers the best air-sealing and insulating performance in one step, which is why it shows up so often in new construction and deep energy retrofits.
If your existing flex duct is original to the house and already rated R-4.2 or R-6, replacing it outright with pre-insulated R-8 flex during a renovation is often more cost-effective than trying to wrap flex duct after the fact — the corrugated surface makes wrap application slower and less uniform than it is on smooth metal trunk lines.
Tools and Materials Checklist
Before heading into the attic, gather what you'll need so you're not making repeat trips through a hatch in 100-degree heat:
- Foil-faced fiberglass duct wrap (correct thickness for your climate zone)
- Duct mastic (paste, applied with a brush) or foil-backed (FSK) tape rated for HVAC use — not standard duct tape
- Utility knife and sharp scissors
- Tape measure
- Wire ties, nylon banding straps, or specialized insulation pins/staples
- Work gloves and a long-sleeve shirt (fiberglass irritates skin)
- N95 respirator mask and safety glasses
- Headlamp or clip-on work light
- Plywood scraps or attic walk boards, if your attic lacks a permanent floor
- A helper, if the attic is tight or poorly lit
Attics are unpleasant workspaces — hot, low-clearance, and easy to misstep in if you're not careful about where the joists are. Budget more time than you think you'll need, and plan to work in the cooler parts of the day if you're doing this in summer.
Step-by-Step: Insulating Attic Ductwork
Step 1: Inspect Before You Insulate
Walk the entire duct run with your light before touching any insulation. Look for disconnected joints, crushed flex duct, torn or missing existing insulation, and obvious gaps at boots and plenum connections. Note anything that needs repair — insulating over a structural problem just hides it and locks in the inefficiency for years.
Step 2: Seal Every Seam and Joint First
This is the step people skip, and it's the one that matters most. Every seam, joint, and connection point along the duct system should get sealed with duct mastic or foil-backed tape before you add a single layer of insulation. Mastic is generally considered the more durable option since it doesn't dry out and peel the way tape can over years of attic heat cycling. Apply it generously over seams, screw penetrations, and the collar where flex duct connects to metal boots. Let it cure according to the product's instructions before wrapping.
Step 3: Measure and Cut the Insulation
Measure the circumference of each duct section and cut wrap with enough overlap — typically 2 to 3 inches — to fully encircle the duct without gaps. For rectangular trunk lines, measure each side separately rather than trying to wrap a single long piece around corners, which tends to leave voids.
Step 4: Wrap With the Vapor Barrier Facing Out
Wrap the insulation around the duct with the foil-faced vapor barrier facing outward, toward the attic air, not the metal duct surface. This orientation keeps moisture from condensing on the cold duct surface and getting trapped against it, which over time can lead to corrosion or mold growth inside the wrap. Compress the insulation as little as possible — R-value depends on loft, and a wrap that's been squeezed too tight underperforms its rating.
Step 5: Secure the Seams
Overlap the seam and tape it closed with matching FSK tape, then secure the wrap along its length with wire ties or banding straps spaced roughly every 12 to 18 inches. Avoid pulling straps tight enough to compress the insulation — snug enough to hold it in place is the goal, not vacuum-sealed.
Step 6: Insulate Boots, Plenums, and Transitions
The connection points — where flex duct meets a metal boot, or where the plenum leaves the air handler — are the areas most often left bare, and they're also where the biggest leaks tend to hide. Wrap these transitions individually, cutting and fitting pieces around irregular shapes rather than skipping them because they're inconvenient.
Step 7: Double-Check for Gaps
Once everything is wrapped, walk the system again with your light, checking for any exposed metal, thin spots, or seams that didn't seal cleanly. Gaps as small as a few inches can create a measurable cold spot or hot spot that undermines the whole system's performance.
Sealing First, Insulating Second: Why the Order Matters
It's worth repeating, because it's the single most common shortcut that reduces a project's payoff: insulation slows heat transfer through the duct wall, but it does nothing to stop air from physically leaking out of a bad seam. A duct system with excellent insulation but leaky joints can still lose 15 to 20 percent of its conditioned air into the attic before it reaches a single room. Mastic and correctly rated foil tape are inexpensive relative to the rest of the project, and skipping this step to save an afternoon is the most expensive shortcut in the whole job.
Common Mistakes That Waste Money
Using standard cloth duct tape. Despite the name, ordinary duct tape isn't rated for HVAC sealing and tends to dry out, crack, and fail within a year or two in attic heat cycles. Always use mastic or UL 181-rated foil tape.
Compressing the insulation too tightly. Straps or ties pulled too hard flatten the fiberglass loft, which reduces the effective R-value below what's printed on the label.
Ignoring the vapor barrier orientation. Facing foil inward instead of outward invites condensation against the duct surface, which can lead to moisture damage over time.
Wrapping over unsealed leaks. As covered above, this hides a problem rather than solving it, and buried leaks are far harder to diagnose later.
Under-sizing the R-value for the climate zone. Grabbing whatever roll of R-4 wrap is on the shelf without checking the local code minimum often means redoing the work later, or failing an inspection if the project is permitted.
Skipping the plenum and boots. These transition points are awkward to reach but disproportionately important — leaving them bare undercuts the benefit of insulating the long, easy-to-reach runs.
DIY vs. Hiring a Professional
Wrapping accessible metal trunk lines is a reasonable DIY project for a homeowner comfortable working in an attic, generally costing a few hundred dollars in materials for a typical single-family home. Where it starts to make more sense to hire a licensed HVAC contractor or insulation specialist:
- The ductwork is difficult to access (low clearance, no walk boards, spray-foam roof decks)
- You want a blower-door or duct-blaster test to verify sealing performance before and after
- The project is being done alongside a larger insulation or air-sealing job qualifying for a utility rebate or tax credit, which often requires contractor documentation
- Existing ductwork needs repair, resizing, or replacement rather than simple wrap-and-seal
Professional duct sealing and insulation projects typically run from several hundred to a couple thousand dollars depending on system size and duct accessibility, but many utilities and the federal Energy Efficient Home Improvement Credit offer incentives that offset part of the cost — worth checking before you start.
Maintenance: What to Check Each Year
Duct insulation isn't a install-it-and-forget-it project forever. Once a year, ideally before the peak cooling or heating season, it's worth a quick visual check for:
- Torn or sagging wrap, especially where rodents or storage boxes may have disturbed it
- Tape seams that have started to lift or peel
- Any new gaps at boots or plenum connections
- Signs of moisture staining on the insulation surface, which can indicate a condensation or leak problem
Catching these early is far cheaper than discovering a failed section during a summer energy bill spike.
Trusted Resources and Where to Verify Codes
Before starting, it's worth confirming the exact requirements for your location and, if needed, tracking down a certified professional. These organizations are good starting points:
- ENERGY STAR (U.S. EPA) — 1200 Pennsylvania Avenue NW, Washington, DC 20460. Publishes consumer guides on duct sealing and home efficiency, plus a directory of certified contractors.
- U.S. Department of Energy — Energy Saver — 1000 Independence Avenue SW, Washington, DC 20585. Offers technical guidance on duct insulation, sealing, and whole-home efficiency programs, including current federal tax credit information.
- NAIMA — North American Insulation Manufacturers Association — 2013 Olde Regent Way, Suite 150, Box 120, Leland, NC 28451. Trade association covering fiberglass and mineral wool insulation standards and product information.
- BPI — Building Performance Institute — 63 Putnam Street, Suite 202, Saratoga Springs, NY 12866. Certifying body for home energy auditors and duct-sealing technicians; useful for finding a BPI-certified contractor near you.
Your local building department is still the final word on which code cycle is currently adopted in your area, since that determines your actual R-value minimum.
Frequently Asked Questions
Do I need to insulate return ducts as well as supply ducts? Yes. Return ducts move air back to the system and are just as exposed to attic temperature swings as supply ducts. Codes typically require the same or a slightly lower R-value for returns, but leaving them bare undermines the whole system's efficiency.
Can I insulate over existing old insulation instead of removing it? If the existing insulation is dry, intact, and not compressed, adding a layer on top can work and boosts total R-value. If it's torn, damp, or moldy, remove it first — insulating over a moisture problem traps it against the duct.
How much can I actually save by insulating attic ducts? Savings vary by climate, duct length, and how leaky the system was beforehand, but homeowners commonly see reductions in the range of 10 to 20 percent on heating and cooling energy use after sealing and insulating a previously bare or poorly insulated attic duct system.
Is spray foam better than duct wrap? Spray foam offers higher R-value per inch and seals as it insulates, but it requires professional application and costs more. For most retrofit projects on existing metal ductwork, properly sealed and wrapped fiberglass insulation delivers strong performance at a fraction of the cost.
What happens if I skip insulation and only seal the ducts? Sealing alone stops air leakage, which is the larger of the two loss mechanisms in many systems, but it doesn't stop conductive heat transfer through the bare duct wall. Doing both together delivers meaningfully better results than either step alone.
Attic ductwork rarely gets a second thought until an energy bill or an uncomfortable room forces the issue. The fix isn't glamorous — it's a few hours with mastic, wrap, and tape in an unpleasant space — but pound for pound, it's one of the better-returning projects available to most homeowners, and one of the few where doing it right the first time genuinely costs about the same as doing it halfway.